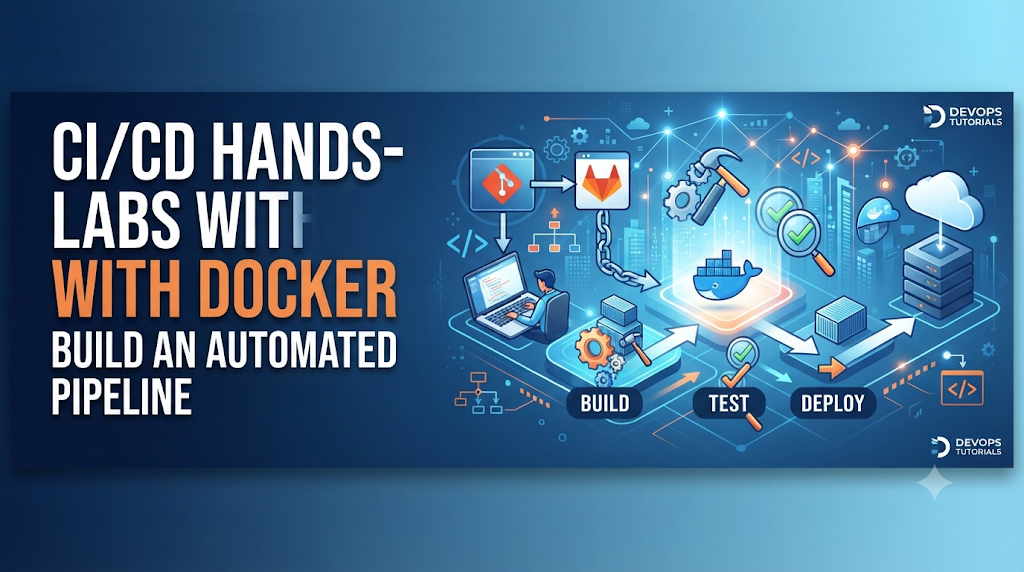
Reading about continuous integration and continuous delivery only takes you so far. Real confidence in DevOps comes from wiring together source control, automated tests, container builds, and deployment scripts until a single code change moves reliably from your laptop to a running server. These CI/CD Hands-On Labs With Docker walk you through that exact progression using one cohesive project.
Start Here: What You Will Build in These Labs
Across the next ten labs, you will build and automate the delivery lifecycle for a lightweight Python REST API called task-pulse. You will start by packaging task-pulse inside a Docker container on your local machine, connect the project to Git, and gradually construct an automated Docker CI/CD pipeline using GitHub Actions and Docker Hub.
By the end of these CI/CD practical exercises, every git push to your repository will automatically:
- Validate your code and run automated unit and integration tests.
- Build a versioned Docker image tagged with the exact Git commit hash.
- Publish the verified image to a remote container registry.
- Deploy the updated container into a target environment and verify its health endpoint.
Throughout this journey, you will gain practical experience with Dockerfiles, container lifecycle commands, Git branching workflows, YAML pipeline definitions, Docker Compose multi-container networking, automated security scanning, and systematic troubleshooting. For engineers looking to deepen their practical foundation alongside structured guided workshops, DevOpsSchool serves as a helpful educational resource for building hands-on DevOps and CI/CD fluency.
Lab Preparation: Set Up Your Docker and CI/CD Environment
Before writing code or configuring automation, verify that your local workstation and cloud accounts are ready. Working through these Docker hands-on labs requires a consistent baseline environment so that commands behave predictably.
Prerequisites Checklist
- Terminal and Git Proficiency: Familiarity with navigating directories, editing files, and running standard
gitcommands in a Linux, macOS, or Windows WSL2 shell. - Docker Engine or Docker Desktop: Needed to build images and run containers locally.
- Docker Compose (v2+): Included with modern Docker Desktop installations and available as the
docker-compose-pluginon Linux. - Source Code Repository: A free GitHub account to host your code and run GitHub Actions workflows.
- Container Registry Account: A free Docker Hub account to store and distribute your built images.
Verify Your Local Tools
Open your terminal and run the following commands to confirm that Git, Docker, and Docker Compose are properly installed and running:
Bash
git --version
docker --version
docker compose version
docker run --rm hello-world
Expected Outcome:
git --versionoutputs a version number such asgit version 2.43.0.docker --versionoutputsDocker version 27.x.xor similar.docker compose versionoutputsDocker Compose version v2.x.x.docker run --rm hello-worldpulls a tiny test image, prints"Hello from Docker!", and exits cleanly. If you receive a permission error on Linux, ensure your user belongs to thedockergroup (sudo usermod -aG docker $USER) and restart your shell session.
Lab 1: Containerize a Simple Application
Objective and Why It Matters
Applications often fail when moved between machines because of missing libraries, conflicting runtime versions, or inconsistent environment variables. Containerization packages your application code alongside its exact runtime dependencies into an immutable unit.
Step 1: Create the Project Directory and Application Files
Create a workspace folder named task-pulse and add a simple Python Flask application along with a unit test file.
Bash
mkdir -p task-pulse/tests
cd task-pulse
Create requirements.txt to pin the exact package versions your application needs:
Plaintext
flask==3.0.3
pytest==8.3.3
requests==2.32.3
Create app.py with a root endpoint and a /health endpoint that our CI/CD pipeline will later use for verification:
Python
import os
from flask import Flask, jsonify

app = Flask(__name__)

APP_VERSION = os.getenv("APP_VERSION", "1.0.0")
APP_ENV = os.getenv("APP_ENV", "local")


@app.route("/")
def index():
    return jsonify({
        "service": "task-pulse",
        "status": "running",
        "version": APP_VERSION,
        "environment": APP_ENV
    })


@app.route("/health")
def health():
    return jsonify({"status": "healthy"}), 200


if __name__ == "__main__":
    app.run(host="0.0.0.0", port=5000)
Create tests/test_app.py so we have an automated test suite ready for later labs:
Python
from app import app


def test_index_route():
    client = app.test_client()
    response = client.get("/")
    assert response.status_code == 200
    data = response.get_json()
    assert data["service"] == "task-pulse"
    assert data["status"] == "running"


def test_health_route():
    client = app.test_client()
    response = client.get("/health")
    assert response.status_code == 200
    assert response.get_json() == {"status": "healthy"}
Step 2: Write the Dockerfile
Create a file named Dockerfile in the root of task-pulse (with no file extension):
Dockerfile
# Use an official, lightweight Python runtime as the base image
FROM python:3.12-slim

# Prevent Python from writing .pyc files and enable unbuffered stdout/stderr logs
ENV PYTHONDONTWRITEBYTECODE=1 \
    PYTHONUNBUFFERED=1

# Set the working directory inside the container
WORKDIR /app

# Copy dependency list first to leverage Docker layer caching
COPY requirements.txt .

# Install dependencies without caching wheel archives to keep the image small
RUN pip install --no-cache-dir -r requirements.txt

# Copy the application source code into the container
COPY app.py .
COPY tests/ ./tests/

# Document that the container listens on port 5000
EXPOSE 5000

# Define the default command to start the application
CMD ["python", "app.py"]
Understanding Key Dockerfile Instructions
FROM python:3.12-slim: Pulls a minimal Debian-based Python image, reducing download size and attack surface compared to the full image.WORKDIR /app: Creates/appinside the container and sets it as the active directory for all subsequent instructions.COPY requirements.txt .beforeCOPY app.py .: Docker caches each layer. Becauserequirements.txtchanges less frequently than application code, Docker reuses the cachedpip installlayer during future builds, speeding up your Docker image build pipeline.EXPOSE 5000: Serves as documentation for developers and orchestration tools indicating which network port the containerized process uses.CMD ["python", "app.py"]: Specifies the executable and arguments run when a container starts.
Your directory structure should now look like this:
Plaintext
task-pulse/
├── Dockerfile
├── app.py
├── requirements.txt
└── tests/
    └── test_app.py
Lab 2: Build and Run Docker Images Manually
Objective and Why It Matters
Before automating anything in a CI server, you must verify that your Dockerfile builds cleanly and runs as expected locally. Manual verification isolates syntax errors and port misconfigurations early.
Step 1: Build and Inspect the Image
Run the build command from inside the task-pulse directory:
Bash
docker build -t task-pulse:1.0.0 .
The -t flag tags the image with a name (task-pulse) and version (1.0.0), while . tells Docker to use the current directory as the build context. Verify that the image exists locally:
Bash
docker images task-pulse
Step 2: Run and Verify the Container
Start a container in detached mode (-d), map host port 8080 to container port 5000 (-p 8080:5000), and assign a readable name:
Bash
docker run -d --name task-pulse-local -p 8080:5000 task-pulse:1.0.0
Test the running service using curl and inspect its logs and runtime metadata:
Bash
curl http://localhost:8080/health
docker logs task-pulse-local
docker inspect --format='{{.State.Status}} - IP: {{.NetworkSettings.IPAddress}}' task-pulse-local
Expected Output:
curlreturns{"status":"healthy"}.docker logsdisplays Flask startup output (* Running on all addresses (0.0.0.0)).docker inspectprintsrunningalong with the container’s internal bridge IP address.
Step 3: Clean Up Local Containers
Stop and remove the test container so port 8080 is free for upcoming exercises:
Bash
docker stop task-pulse-local
docker rm task-pulse-local
Investigating Build and Runtime Errors
If docker build fails during pip install, verify internet connectivity and package spelling in requirements.txt. If a container starts and immediately exits (Exited (1) in docker ps -a), run docker logs <container_name> to read the Python traceback—most runtime exits stem from syntax errors or binding to 127.0.0.1 instead of 0.0.0.0 inside the container.
Lab 3: Connect the Project With Git
Objective and Why It Matters
Version control is the backbone of continuous integration with Docker. Every automated build must trace back to a specific commit, author, and branch so teams can audit changes and roll back faulty releases quickly.
Step 1: Initialize Git and Add .gitignore
Inside task-pulse, initialize a Git repository and create a .gitignore file to prevent temporary artifacts from polluting your repository:
Bash
git init -b main
cat << 'EOF' > .gitignore
__pycache__/
*.py[cod]
.pytest_cache/
.env
.venv/
EOF
Step 2: Stage, Commit, and Push to a Remote Repository
Create a new empty repository named task-pulse on GitHub (without initializing a README or license, so there are no merge conflicts). Then link your local repository and push your initial commit:
Bash
git add .
git commit -m "feat: add initial task-pulse API and Dockerfile"
git remote add origin https://github.com/<your-username>/task-pulse.git
git push -u origin main
How Branches and Commits Drive Automation
In a standard CI/CD workflow, developers create feature branches (such as git checkout -b feat/add-metrics), push commits, and open pull requests against main. CI systems listen for these webhook events—running validation checks on pull requests and triggering full image builds and deployments when changes merge into main.
Lab 4: Create Your First Docker-Based CI Pipeline
Objective and Why It Matters
Running tests manually relies on human discipline. A continuous integration pipeline enforces automated checks on every code push, catching regressions within minutes before broken code reaches shared environments.
Step 1: Create the GitHub Actions Workflow File
GitHub Actions looks for YAML workflow definitions inside .github/workflows/. Create the directory and workflow file:
Bash
mkdir -p .github/workflows
Create .github/workflows/ci-cd.yml:
YAML
name: Task Pulse CI/CD Pipeline

on:
  push:
    branches:
      - main
  pull_request:
    branches:
      - main

jobs:
  validate-and-test:
    name: Validate and Run Unit Tests
    runs-on: ubuntu-latest

    steps:
      - name: Checkout source code
        uses: actions/checkout@v4

      - name: Verify Docker environment
        run: |
          docker --version
          docker compose version

      - name: Set up Python 3.12
        uses: actions/setup-python@v5
        with:
          python-version: "3.12"

      - name: Install dependencies and run pytest
        run: |
          python -m pip install --upgrade pip
          pip install -r requirements.txt
          pytest -v
Explaining the Workflow Configuration
on: pushandon: pull_request: Configures the pipeline to trigger whenever commits are pushed directly tomainor proposed via a pull request.runs-on: ubuntu-latest: Provisions a clean, ephemeral Linux virtual machine hosted by GitHub with Docker pre-installed.actions/checkout@v4: Clones your repository into the runner workspace so subsequent commands can accessapp.py,Dockerfile, andtests/.pytest -v: Executes your unit test suite in verbose mode; if any assertion fails, the step exits with a non-zero status code and halts the workflow.
Step 2: Trigger and Verify the Pipeline
Commit and push the workflow file:
Bash
git add .github/workflows/ci-cd.yml
git commit -m "ci: add initial test workflow"
git push origin main
Expected Result: Navigate to the Actions tab in your GitHub repository. You will see Task Pulse CI/CD Pipeline running and turning green once pytest passes.
Lab 5: Automate Docker Image Building
Objective and Why It Matters
Once tests pass, your pipeline should produce an immutable artifact. Automating image builds inside CI eliminates “works on my machine” discrepancies and ensures every image follows uniform naming and tagging conventions.
Image Naming and Tagging Strategy
Avoid relying solely on the mutable :latest tag. In Docker container automation, tag images with the short Git commit SHA (${{ github.sha }}) so every container running in an environment maps unambiguously to a specific commit in Git history.
Extend .github/workflows/ci-cd.yml
Add a build-image job that depends on validate-and-test via the needs keyword. If tests fail, the image build never runs.
YAML
  build-image:
    name: Build and Verify Docker Image
    runs-on: ubuntu-latest
    needs: validate-and-test

    steps:
      - name: Checkout source code
        uses: actions/checkout@v4

      - name: Extract short commit SHA
        id: vars
        run: echo "SHORT_SHA=${GITHUB_SHA::7}" >> $GITHUB_OUTPUT

      - name: Build Docker image
        run: |
          docker build \
            --build-arg BUILD_DATE=$(date -u +'%Y-%m-%dT%H:%M:%SZ') \
            -t task-pulse:${{ steps.vars.outputs.SHORT_SHA }} \
            -t task-pulse:latest \
            .

      - name: Verify built image metadata
        run: |
          docker images task-pulse
          docker image inspect task-pulse:${{ steps.vars.outputs.SHORT_SHA }} --format='Created: {{.Created}} | Size: {{.Size}} bytes'
Commit and push this update. In the GitHub Actions log for Build and Verify Docker Image, confirm that docker images lists both your 7-character commit tag and latest.
Lab 6: Add Automated Testing Before Image Publishing
Objective and Why It Matters
Passing unit tests against raw Python files does not guarantee your containerized application works. Packaging errors—such as forgetting to copy a file in the Dockerfile or exposing the wrong port—only appear when running the actual container.
Adding Containerized Integration and Health Checks
Extend the build-image job in .github/workflows/ci-cd.yml to run unit tests inside the container, start the container in the background, and verify its /health endpoint over HTTP before allowing the pipeline to proceed:
YAML
      - name: Run unit tests inside container
        run: |
          docker run --rm task-pulse:${{ steps.vars.outputs.SHORT_SHA }} pytest -v

      - name: Integration test on running container
        run: |
          docker run -d --name ci-smoke-test -p 5000:5000 \
            -e APP_VERSION=${{ steps.vars.outputs.SHORT_SHA }} \
            -e APP_ENV=ci \
            task-pulse:${{ steps.vars.outputs.SHORT_SHA }}

          # Wait briefly for Flask to bind to port 5000
          for i in {1..10}; do
            if curl -sf http://localhost:5000/health; then
              echo "Health check passed!"
              break
            fi
            sleep 1
          done

          # Assert exact JSON payload from root endpoint
          RESPONSE=$(curl -sf http://localhost:5000/)
          echo "Root response: $RESPONSE"
          echo "$RESPONSE" | grep -q '"environment":"ci"'

          docker stop ci-smoke-test
          docker rm ci-smoke-test
Failure Conditions
Because GitHub Actions runs shell steps with set -e by default, any failed pytest assertion, unreachable /health check, or missing string in grep immediately aborts the job. No unverified image ever reaches your registry.
Lab 7: Push Docker Images to a Container Registry
Objective and Why It Matters
Images built on an ephemeral CI runner vanish as soon as the job finishes. Pushing verified images to a central registry such as Docker Hub makes them accessible to staging servers, production clusters, and team members.
Step 1: Configure Secure Credentials
Never hardcode passwords or access tokens in your Dockerfile or YAML files.
- Log in to Docker Hub, open Account Settings > Personal access tokens, and generate a token with Read & Write permissions.
- In your GitHub repository, navigate to Settings > Secrets and variables > Actions and create two repository secrets:
DOCKERHUB_USERNAME: Your Docker Hub username.DOCKERHUB_TOKEN: The personal access token you generated.
Step 2: Update the Pipeline to Tag and Push
Update the build-image job in .github/workflows/ci-cd.yml to log in using your secrets, tag the image with your Docker Hub namespace (${{ secrets.DOCKERHUB_USERNAME }}/task-pulse), and push it only on main branch builds (not untrusted pull requests):
YAML
      - name: Log in to Docker Hub
        if: github.ref == 'refs/heads/main'
        uses: docker/login-action@v3
        with:
          username: ${{ secrets.DOCKERHUB_USERNAME }}
          password: ${{ secrets.DOCKERHUB_TOKEN }}

      - name: Tag and push image to Docker Hub
        if: github.ref == 'refs/heads/main'
        run: |
          IMAGE_REPO="${{ secrets.DOCKERHUB_USERNAME }}/task-pulse"
          docker tag task-pulse:${{ steps.vars.outputs.SHORT_SHA }} $IMAGE_REPO:${{ steps.vars.outputs.SHORT_SHA }}
          docker tag task-pulse:${{ steps.vars.outputs.SHORT_SHA }} $IMAGE_REPO:latest
          docker push $IMAGE_REPO:${{ steps.vars.outputs.SHORT_SHA }}
          docker push $IMAGE_REPO:latest
Step 3: Verify by Pulling the Remote Image
Once the pipeline completes, pull the published image onto your local machine to confirm it is publicly retrievable:
Bash
docker pull <your-dockerhub-username>/task-pulse:latest
Lab 8: Run Multi-Container Applications With Docker Compose
Objective and Why It Matters
Real-world Docker DevOps projects rarely consist of a single stateless container. Web APIs typically depend on databases, caches, or message brokers. Docker Compose lets you define multi-service architectures, private networks, persistent volumes, and health-based startup ordering in one declarative file.
Step 1: Create compose.yaml
In the root of task-pulse, create compose.yaml to run the task-pulse API alongside a Redis cache service:
YAML
services:
  redis:
    image: redis:7.4-alpine
    container_name: task-pulse-redis
    restart: unless-stopped
    volumes:
      - redis_data:/data
    healthcheck:
      test: ["CMD", "redis-cli", "ping"]
      interval: 5s
      timeout: 3s
      retries: 5

  api:
    build:
      context: .
      dockerfile: Dockerfile
    image: task-pulse:local
    container_name: task-pulse-api
    ports:
      - "8080:5000"
    environment:
      APP_VERSION: "1.1.0"
      APP_ENV: "compose-lab"
      REDIS_HOST: "redis"
    depends_on:
      redis:
        condition: service_healthy
    healthcheck:
      test: ["CMD", "python", "-c", "import urllib.request; urllib.request.urlopen('http://localhost:5000/health')"]
      interval: 10s
      timeout: 3s
      retries: 3

volumes:
  redis_data:
How Docker Compose Coordinates Services
- Service Networking: Compose creates an isolated bridge network where
apican reachredissimply by using the hostnameredis. - Startup Order (
depends_on): Usingcondition: service_healthyensures the API container waits until Redis responds toredis-cli pingbefore booting. - Persistent Storage (
volumes):redis_datapreserves database files across container restarts.
Step 2: Start, Inspect, and Stop the Stack
Run the multi-container stack locally:
Bash
docker compose up -d --build
docker compose ps
curl http://localhost:8080/
docker compose logs -f api
When finished inspecting, tear down the containers while preserving or removing volumes (-v removes volumes):
Bash
docker compose down -v
Lab 9: Automate Deployment Using a Docker Image
Objective and Why It Matters
Continuous deployment with Docker bridges the gap between a published registry artifact and a live environment. Instead of manually SSHing into servers to pull images, an automated deployment job replaces old containers safely and verifies service health immediately.
Lab Demonstration vs. Production Deployment
| Dimension | Lab Demonstration Deployment | Production Deployment |
| Target Host | Single VM or simulated runner environment | Orchestrated cluster (Kubernetes, ECS) or multi-node Swarm |
| Cutover Strategy | Stop old container, start new container (brief downtime) | Rolling update or Blue/Green deployment (zero downtime) |
| Rollback Mechanism | Re-run pipeline or docker run with previous SHA tag | Automated health-probe rollback and traffic shifting |
| Secrets Injection | Encrypted CI secrets passed via -e or .env file | Dedicated secrets manager (Vault, AWS Secrets Manager) |
Add a Deployment Job to .github/workflows/ci-cd.yml
In a real server setup, a deployment job connects over SSH (using a tool like appleboy/ssh-action) or triggers a webhook on your target host. Below is a safe, self-contained deployment simulation job you can append to .github/workflows/ci-cd.yml to practice the exact pull-replace-verify sequence:
YAML
  deploy-staging:
    name: Deploy to Staging Environment
    runs-on: ubuntu-latest
    needs: build-image
    if: github.ref == 'refs/heads/main'

    steps:
      - name: Pull versioned image and roll out container
        run: |
          IMAGE_TAG="${{ secrets.DOCKERHUB_USERNAME }}/task-pulse:${GITHUB_SHA::7}"
          echo "Pulling verified artifact: $IMAGE_TAG"
          docker pull "$IMAGE_TAG"

          # Gracefully stop and remove existing container if present
          docker stop task-pulse-staging 2>/dev/null || true
          docker rm task-pulse-staging 2>/dev/null || true

          # Start updated container with production-like restart policy
          docker run -d \
            --name task-pulse-staging \
            --restart unless-stopped \
            -p 8080:5000 \
            -e APP_VERSION="${GITHUB_SHA::7}" \
            -e APP_ENV="staging" \
            "$IMAGE_TAG"

      - name: Post-deployment health verification
        run: |
          sleep 3
          STATUS=$(curl -s -o /dev/null -w "%{http_code}" http://localhost:8080/health)
          if [ "$STATUS" -ne 200 ]; then
            echo "Deployment verification failed with HTTP $STATUS"
            docker logs task-pulse-staging
            exit 1
          fi
          echo "Staging deployment healthy (HTTP 200)."
If the health check fails ($STATUS -ne 200), the job prints container logs and fails visibly, alerting your team immediately.
Lab 10: Improve the Pipeline With Security and Reliability Checks
Objective and Why It Matters
Speed without guardrails creates operational risk. Hardening your Dockerfile and adding automated vulnerability scanning prevents compromised dependencies and overly permissive containers from reaching production.
Hardening the Dockerfile
Update Dockerfile to run as an unprivileged non-root user and exclude unnecessary build context files via a .dockerignore file.
Create .dockerignore:
Plaintext
.git
.github
__pycache__
.pytest_cache
.env
compose.yaml
README.md
Update Dockerfile to create a dedicated appuser:
Dockerfile
FROM python:3.12-slim

ENV PYTHONDONTWRITEBYTECODE=1 \
    PYTHONUNBUFFERED=1

WORKDIR /app

# Create a non-root system user and group
RUN groupadd --system appgroup && useradd --system --gid appgroup appuser

COPY requirements.txt .
RUN pip install --no-cache-dir -r requirements.txt

COPY app.py .
COPY tests/ ./tests/

# Transfer ownership of application files to the non-root user
RUN chown -R appuser:appgroup /app

USER appuser

EXPOSE 5000
CMD ["python", "app.py"]
Add Vulnerability Scanning to Your Pipeline
Integrate Trivy (an open-source container vulnerability scanner) into your build-image job right after docker build and before docker push. This ensures images with critical OS or Python package vulnerabilities are blocked before publication:
YAML
      - name: Scan Docker image for HIGH and CRITICAL vulnerabilities
        uses: aquasecurity/trivy-action@0.28.0
        with:
          image-ref: "task-pulse:${{ steps.vars.outputs.SHORT_SHA }}"
          format: "table"
          exit-code: "1"
          ignore-unfixed: true
          severity: "CRITICAL,HIGH"
Additional Reliability Practices for Production Pipelines
- Pin Base Image Digests: For strict reproducibility, pin base images using SHA256 digests (
FROM python:3.12-slim@sha256:...) alongside version tags. - Traceability Labels: Add OCI labels (
org.opencontainers.image.revision) duringdocker buildso operations teams can inspect any running container and identify its exact source commit. - Least-Privilege Access Control: Scope registry tokens to specific repositories and restrict deployment credentials to protected branches (
main) with required pull request approvals.
Troubleshooting Workshop: Fix Common Docker CI/CD Failures
Even well-structured pipelines break. Use this diagnostic reference when troubleshooting failures across local machines or CI runners.
| Failure Scenario | Likely Cause | Diagnostic Commands | Practical Resolution |
| Docker daemon unavailable | Docker Desktop is stopped, or the Linux docker.service is inactive. | systemctl status dockerdocker info | Start Docker Desktop or run sudo systemctl start docker. |
| Image build failures | Missing dependency in requirements.txt, network timeout, or invalid syntax. | docker build --no-cache --progress=plain . | Inspect the exact failing RUN layer in plain logs and pin valid package versions. |
| Incorrect Dockerfile paths | Running docker build from the wrong directory or referencing files outside the build context. | pwd && ls -la | Run docker build -f path/to/Dockerfile . from the project root directory. |
| Permission problems | Linux user lacks access to /var/run/docker.sock, or non-root container user cannot write to a mounted volume. | idls -l /var/run/docker.sock | Add user to docker group locally, or chown directories for appuser inside the Dockerfile. |
| Failed application tests | Code regression or missing environment variables during CI test execution. | pytest -vv --tb=short | Reproduce locally using the exact environment variables defined in your CI YAML. |
| Registry authentication errors | Expired Docker Hub token, typo in GitHub Secret name, or missing write permissions. | echo "$DOCKERHUB_TOKEN" | docker login -u "$DOCKERHUB_USERNAME" --password-stdin | Regenerate a Read/Write personal access token and update repository secrets. |
| Image tagging mistakes | Mismatch between the tag built in Step A and the tag pushed or pulled in Step B. | docker images | Store the computed tag in a single CI output variable (SHORT_SHA) and reuse it everywhere. |
| Port conflicts | Another process or leftover container is already bound to host port 8080 or 5000. | docker psss -tulpn | grep 8080 | Stop conflicting containers (docker rm -f <name>) or map a different host port (-p 8081:5000). |
| Container startup failures | Application crashes immediately due to missing required env vars or bad CMD syntax. | docker ps -adocker logs <container> | Check exit code (Exited (1)) and verify CMD uses exec-form JSON array syntax. |
| Deployment health-check failures | Health probe runs before the application finishes booting, or app binds to 127.0.0.1. | docker exec <container> curl -v http://localhost:5000/health | Bind server to 0.0.0.0 and add a retry loop or Compose healthcheck with start_period. |
Final Practical Challenge: Build an End-to-End Docker CI/CD Project
Now that you have practiced each pipeline stage individually, combine them into an independent capstone exercise.
Project Brief
Extend task-pulse (or build a new microservice such as a URL shortener or status tracker) with a new /tasks endpoint that stores and retrieves items using Redis. Configure a complete automated pipeline from commit to staging deployment.
Required Tasks
- Modify the Application: Add a
/tasksendpoint (supportingGETandPOST) backed by Redis, plus unit tests covering valid and invalid payloads. - Manage Code in Git: Develop the feature on a dedicated branch (
feat/tasks-endpoint), open a pull request, and merge intomain. - Automate Testing: Ensure unit tests and a multi-container integration test (API + Redis) execute automatically in CI.
- Build and Harden the Image: Package the updated service using a non-root user and scan the image with Trivy.
- Tag and Publish: Tag the verified image with both the Git commit SHA and semantic version (
1.2.0), then push it to Docker Hub. - Deploy and Verify: Automatically deploy the updated container in your staging job and verify both
/healthand/tasks. - Document the Workflow: Write a clear
README.mdexplaining prerequisites, local Docker Compose usage, required CI secrets, and rollback steps.
Deliverables and Success Criteria
- Deliverables: A public GitHub repository containing application code, tests, hardened
Dockerfile,compose.yaml,.github/workflows/ci-cd.yml, andREADME.md, alongside published versioned tags on Docker Hub. - Success Criteria: Pushing a broken test intentionally fails the pipeline before
docker pushruns; fixing the test turns the entire workflow green, publishes the SHA-tagged image to Docker Hub, and passes post-deployment HTTP verification.
What Learners Should Understand After Completing the Labs
Working through these ten exercises builds practical competence across the core pillars of modern container delivery:
- Containerization Fundamentals: Writing clean, cache-friendly
Dockerfiledefinitions with minimal base images and non-root execution. - Container Lifecycle Management: Building, running, inspecting logs, debugging port bindings, and cleaning up containers reliably.
- Source-Driven Automation: Structuring Git repositories and branches so every pipeline execution maps to an auditable commit.
- Automated Quality Gates: Combining fast unit tests, live container health probes, and vulnerability scans to stop broken or insecure builds early.
- Artifact Management: Tagging images deterministically with commit hashes and securely authenticating against container registries.
- Multi-Service Orchestration: Coordinating application containers, databases, networks, and health dependencies with Docker Compose.
- Deployment Reliability: Replacing running containers safely, verifying post-deploy health, and diagnosing failures methodically.
Conclusion: Turn Docker Practice Into a Repeatable CI/CD Workflow
Mastering CI/CD does not require memorizing every flag or YAML keyword on day one. Breaking the delivery lifecycle into small, verifiable labs—containerizing an app, running tests in isolation, tagging images deterministically, and automating health checks—shows how each stage protects the next. When every commit passes through automated tests, security scans, and versioned registry builds, deployments stop feeling like risky manual events and become routine engineering tasks. Take the final challenge further by experimenting with multi-stage Docker builds to shrink image sizes even more, adding automated rollback scripts when health checks fail, or deploying your Docker Hub images onto a managed cloud container service or Kubernetes cluster.