Introduction
Modern software development relies heavily on automated workflows to release applications with speed and precision. At the center of this automation is continuous integration and continuous deployment, commonly known as CI/CD. For beginners and experienced professionals alike, enterprise-scale automation can initially feel overwhelming. However, the most effective way to gain confidence and practical expertise is by breaking software delivery down into smaller, structured phases using multi-stage pipelines.
A multi-stage pipeline organizes the software release process into clear, sequential steps such as compilation, testing, and deployment. Each phase functions as a crucial quality gate; if an issue arises, the process stops immediately to prevent defective code from reaching downstream environments. Working through hands-on pipeline exercises allows you to experience real-world engineering workflows firsthand. For structured training and expert guidance in mastering essential DevOps and CI/CD competencies, DevOpsSchool provides exceptional learning pathways for technical professionals at every stage of their career.
Start With the Pipeline Workflow
Before writing any configuration files, it helps to understand the journey a piece of code takes from a developer’s local machine to a live server. Software delivery is rarely a single monolithic step. Instead, it is a sequence of specialized tasks designed to validate, package, and release code safely.
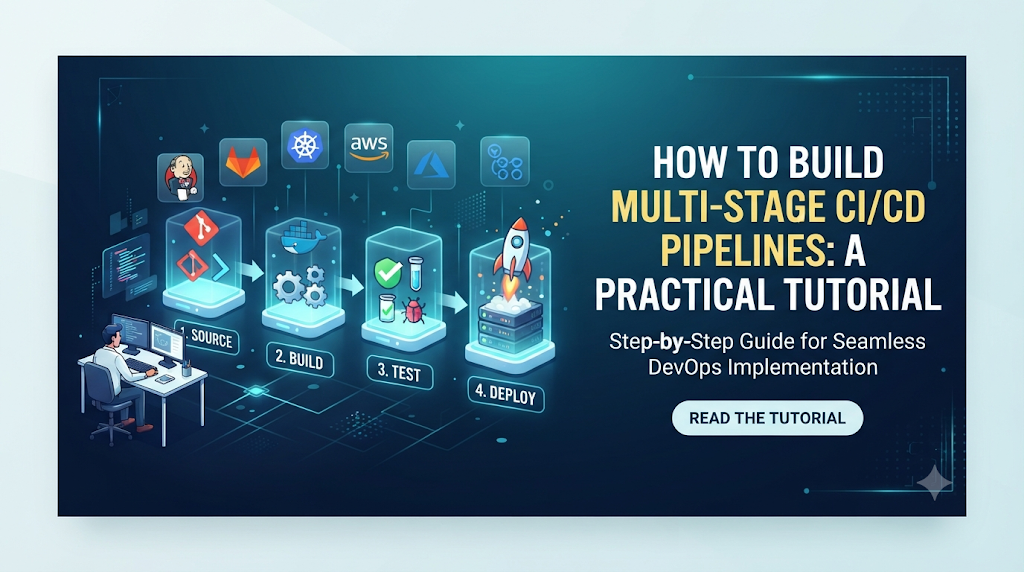
A typical multi-stage pipeline includes a combination of the following stages:
- Source checkout: Pulling the latest source code from a version control system like Git.
- Dependency installation: Downloading and configuring the required libraries, packages, and frameworks needed by the application.
- Build: Compiling code or bundling assets into executable or distributable formats.
- Unit testing: Running automated test suites to verify that individual components function correctly.
- Code quality and security checks: Scanning code for syntax errors, style violations, and known security vulnerabilities.
- Artifact creation: Packaging the verified build output into a reusable archive or container image.
- Staging deployment: Deploying the application to a pre-production environment that mirrors live infrastructure.
- Production deployment: Releasing the application to end-users in the live production environment.
Every project uses a different combination of these stages depending on its technology stack and business requirements. A simple script might only require a build and test stage, while a microservices architecture may require parallel testing, container registry pushes, and multi-region deployments.
Prepare Your Practice Environment
To build your first practice pipeline, you need a lightweight environment that lets you experiment without incurring high infrastructure costs or creating complex network architectures.
The basic requirements for a practice pipeline include:
- A sample application or Git repository: A simple web application or script hosted on GitHub, GitLab, or Bitbucket.
- A CI/CD platform: An automation engine such as GitHub Actions, GitLab CI, Jenkins, or CircleCI.
- A build runtime and required dependencies: Runtimes matching your application stack, such as Node.js, Python, Java, or Docker.
- A test environment: A local container or lightweight runner service where tests can execute safely.
- Artifact storage: A local directory, workspace cache, or cloud storage bucket to hold build outputs.
- A deployment target: A local server, cloud virtual machine, or container platform like Docker Compose.
- Access credentials and environment variables: Secure tokens or keys required to push code, upload artifacts, or connect to target environments.
Beginners can start entirely within free-tier cloud-hosted CI/CD platforms and local repositories, keeping infrastructure setup simple and focused purely on pipeline logic.
Design the Pipeline Before Writing Configuration
Jumping straight into writing YAML or configuration scripts often leads to confusion. A well-designed pipeline starts with a clear plan on paper or in a whiteboard diagram.
When designing your workflow, consider the following structural elements:
- Stages: Major logical divisions in your pipeline (e.g., Build, Test, Deploy).
- Jobs: Independent sets of tasks that execute within a specific stage.
- Tasks: Individual commands or actions executed sequentially inside a job.
- Dependencies: Rules determining whether a stage can run independently or must wait for a previous stage to succeed.
- Conditions: Logic that dictates when a job should run (e.g., only on the main branch or after a manual click).
- Parallel execution: Running independent tasks simultaneously to reduce overall pipeline duration.
- Artifact handoffs: Passing generated files from one stage to subsequent stages.
Sample Pipeline Flow
[ Source Code ]
       │
       ▼
  [ Build Stage ] ──► Compiles code and generates build artifact
       │
       ▼
   [ Test Stage ]  ──► Runs unit tests against the build artifact
       │
       ▼
 [ Deploy Stage ]  ──► Publishes artifact to staging server
When grouping tasks, ensure that fast checks like syntax validation and unit tests run before slower tasks like integration tests or deployments. This provides rapid feedback to the developer.
Build Your First Multi-Stage Pipeline
Let us look at a practical, beginner-friendly implementation using a standard CI/CD configuration file format. For this walkthrough, we will use a hypothetical pipeline configuration file representing a multi-stage workflow for a web application.
Pipeline Configuration Walkthrough
YAML
name: Practice CI/CD Pipeline

on:
  push:
    branches: [ "main" ]

stages:
  - build
  - test
  - staging
  - production

jobs:
  build-job:
    runs-on: ubuntu-latest
    stage: build
    steps:
      - name: Checkout source code
        uses: actions/checkout@v4

      - name: Set up Node.js runtime
        uses: actions/setup-node@v4
        with:
          node-version: '18'

      - name: Install dependencies
        run: npm ci

      - name: Build application bundle
        run: npm run build

      - name: Archive production artifacts
        uses: actions/upload-artifact@v4
        with:
          name: app-bundle
          path: dist/

  test-job:
    needs: build-job
    runs-on: ubuntu-latest
    stage: test
    steps:
      - name: Checkout source code
        uses: actions/checkout@v4

      - name: Set up Node.js runtime
        uses: actions/setup-node@v4
        with:
          node-version: '18'

      - name: Install dependencies
        run: npm ci

      - name: Run unit test suite
        run: npm test

  staging-deploy:
    needs: test-job
    runs-on: ubuntu-latest
    stage: staging
    steps:
      - name: Download build artifact
        uses: actions/download-artifact@v4
        with:
          name: app-bundle
          path: dist/

      - name: Deploy to Staging Server
        run: |
          echo "Connecting to staging environment..."
          echo "Deploying application files to staging server..."
          # Insert deployment script or command here

  production-deploy:
    needs: staging-deploy
    runs-on: ubuntu-latest
    stage: production
    environment: production
    steps:
      - name: Download build artifact
        uses: actions/download-artifact@v4
        with:
          name: app-bundle
          path: dist/

      - name: Deploy to Production Server
        run: |
          echo "Deploying application files to production server..."
          # Insert production release command here
Breakdown of the Configuration
- Connecting the source repository: The
actions/checkout@v4step fetches the repository code into the runner workspace. - Defining pipeline triggers: The
on: pushblock ensures the pipeline runs automatically whenever code is pushed to the main branch. - Configuring the build stage: The
build-jobinstalls dependencies usingnpm ciand compiles the application into adist/directory. - Adding automated tests: The
test-jobrelies on the completion of the build job (needs: build-job) and executes the unit test suite. - Creating and storing build artifacts: The
upload-artifactstep saves the compileddist/folder so it can be used in later stages without rebuilding. - Passing artifacts to the next stage: Subsequent jobs use
download-artifactto retrieve the exact package verified by the test stage. - Deploying to a staging environment: The
staging-deployjob pushes the verified artifact to a staging environment for review. - Adding a controlled production deployment stage: The
production-deployjob executes last, often protected by environment protection rules or manual review gates.
Understand How Stages Communicate
As pipelines grow, understanding how different stages communicate is vital. Jobs running in a CI/CD platform often execute on ephemeral virtual machines or isolated containers. This means that files created in one job do not automatically exist in the next job unless explicitly handled.
Artifacts vs. Caches
| Feature | Artifacts | Caches |
| Purpose | To pass build outputs or compiled deliverables between stages. | To speed up pipeline execution by storing dependencies (e.g., node_modules). |
| Lifecycle | Stored for a specific duration or download window per pipeline run. | Persisted across multiple pipeline runs based on cache keys. |
| Reliability | Highly reliable; guaranteed to be present for dependent jobs. | Best-effort; if a cache is evicted or missing, the pipeline must still function. |
Reliable artifact handling ensures that the exact code tested in your test stage is the exact code deployed to your production environment. Relying on re-compilation in later stages introduces the risk of environment drift or unexpected code changes.
Add Quality and Security Checks
A robust pipeline does more than just build and deploy; it acts as an automated quality guardian. Integrating security and quality checks early in the pipeline prevents vulnerabilities from reaching production.
Essential Quality Controls
- Unit tests: Verify small units of code logic, ensuring functions behave as expected.
- Code quality checks: Use linters and static analysis tools to catch syntax issues, dead code, and formatting inconsistencies.
- Dependency scanning: Check third-party packages for known vulnerabilities or outdated versions.
- Secret detection: Scan source code and commit history for accidentally exposed API keys, passwords, or tokens.
Security Gates
Security checks should act as gates. For example, if a static analysis tool or vulnerability scanner finds a critical security flaw, the pipeline must fail immediately, stopping the deployment process. Furthermore, sensitive credentials such as deployment keys and database passwords must never be written directly into configuration files. Instead, they should be stored securely in the CI/CD platform’s secret manager and injected as environment variables at runtime.
Make the Pipeline More Realistic
Once you have a basic linear pipeline working, you can introduce advanced features to mirror real-world production engineering practices.
- Parallel testing: Split large test suites into multiple parallel jobs to reduce overall pipeline execution time.
- Conditional execution: Configure jobs to run only under specific conditions, such as running a security audit only on pull requests or scheduled nightly builds.
- Manual approvals: Add human-in-the-loop gates before deploying to production environments to prevent accidental releases.
- Environment-specific variables: Use different configuration variables for development, staging, and production environments.
- Reusable steps: Create templates or composite actions for repetitive tasks like setting up cloud CLI tools or authenticating with container registries.
- Deployment notifications: Integrate messaging tools or email alerts to notify engineering teams when a build succeeds or fails.
These enhancements improve feedback loops, increase safety, and prepare practitioners for complex enterprise workflows.
Practice Challenge: Extend the Pipeline
To solidify your understanding, try extending the working pipeline you created in the earlier walkthrough by completing the following hands-on practice challenge:
- Add a separate integration-testing stage: Create a new job that runs after unit tests, executing API or end-to-end test scripts against a temporary test server.
- Run security checks before artifact publishing: Insert a dependency vulnerability scanning task into the build stage, configured to fail the pipeline if high-severity vulnerabilities are found.
- Deploy to a second test environment: Create an alternative deployment stage that pushes updates to an evaluation environment on every pull request.
- Add a manual approval before production: Configure a protection rule on your production deployment job that requires manual review and approval from a team member before execution.
- Configure automatic notifications: Set up post-deployment notification steps to log success or failure messages to a console or webhook endpoint.
Work through these challenges step by step, testing your configuration changes incrementally to see how each addition affects pipeline behavior.
Troubleshooting Common Pipeline Problems
Even experienced engineers encounter pipeline failures during development. Knowing how to diagnose and resolve these issues efficiently is an essential DevOps skill.
- Failed builds: Usually caused by syntax errors, missing build scripts, or incorrect compiler versions. Inspection: Review the build job logs to pinpoint the exact failing command line, fix the code locally, and push the update.
- Missing dependencies: Occurs when package managers fail to fetch required libraries. Inspection: Check network connectivity, verify package manager lock files, and ensure caching keys match correctly.
- Incorrect stage ordering: Happens when a dependent job executes before its prerequisite completes. Inspection: Check the
needsor dependency declarations in your configuration file. - Unavailable artifacts: Caused by incorrect artifact paths or mismatched artifact names between upload and download steps. Inspection: Verify the directory path specified during upload matches the download target.
- Environment-variable errors: Manifests when an application crashes due to missing configuration keys. Inspection: Verify that all required secrets and variables are correctly defined in your CI/CD platform settings.
- Permission problems: Arises when deployment scripts lack write access to target servers or object storage. Inspection: Review SSH keys, service account roles, and cloud IAM permissions.
- Test failures: Triggered by code regressions or flaky tests. Inspection: Run the test suite locally in an isolated container to replicate and debug the failure.
- Deployment timeouts: Caused by network congestion, hanging deployment scripts, or unresponsive servers. Inspection: Check target server health and increase timeout limits if necessary.
Evaluate Your Pipeline
A common misconception is that a pipeline is successful simply because it finishes running without errors. True evaluation requires measuring both operational performance and reliability.
Key metrics to assess your pipeline include:
- Build success rate: The percentage of pipeline runs that complete successfully over time.
- Stage duration: How long each stage takes to execute, helping identify bottlenecks.
- Test results: Pass rates and coverage metrics for automated test suites.
- Deployment status: Frequency and stability of successful staging and production releases.
- Failure frequency and recovery time: How often pipelines break and how quickly teams diagnose and fix the root cause.
Remember that a green pipeline run proves that your automation scripts executed successfully, but it does not automatically guarantee that your application logic is bug-free or completely secure. Comprehensive testing and continuous monitoring remain essential.
From Practice Lab to Real Projects
Once you are comfortable building and troubleshooting basic multi-stage pipelines, you can apply these principles to more advanced, enterprise-grade architectures.
You can extend your practice exercises into areas such as:
- Containerized applications: Packaging applications into Docker containers and pushing images to private or public container registries.
- Infrastructure as Code (IaC): Integrating tools like Terraform or OpenTofu to provision cloud infrastructure automatically before deploying applications.
- Kubernetes deployments: Using CI/CD pipelines to apply declarative manifests or Helm charts to production Kubernetes clusters.
- Advanced release strategies: Implementing blue-green deployments or canary releases to minimize downtime and risk during updates.
Always remember to maintain strict security practices—such as least-privilege access, robust secret management, and comprehensive logging—before transitioning any practice workflow into a production environment.
Conclusion: Build, Test, Improve, and Repeat
Building multi-stage pipelines is one of the most effective ways to bridge the gap between theoretical DevOps concepts and practical engineering capability. By dividing software delivery into smaller, manageable stages—such as source checkout, building, testing, artifact handling, and deployment—you gain complete visibility and control over how applications move from code to production. Throughout your learning journey, remember the importance of understanding each stage, managing artifacts reliably, integrating automated quality checks, and developing a systematic approach to troubleshooting failures. Pipeline automation is an iterative craft. Start small, experiment with new features, test your changes regularly, and gradually improve your workflows through consistent hands-on practice.